Why Your Dryer will not Start and How to Fix It

A functioning dryer can be a real time-saver, but when it suddenly refuses to start, it can be frustrating. Before you call in a professional, consider trying some basic troubleshooting steps to identify and possibly resolve the issue yourself. In this guide, we’ll explore the top reasons why your dryer might not be powering up and offer practical solutions you can implement at home to get it running again.
1.Dryer Door Not Properly Closed
If your dryer isn’t starting, the first thing to check is whether the door is properly closed. Dryers are designed to start only when the door is securely latched to ensure safety. For front-loading models, make sure that no clothing is blocking the door from closing completely. Even a small item caught in the door can prevent the door from making full contact with the door switch, which is essential for the dryer to recognize that it is closed. If the door isn’t fully latched, gently close it again, ensuring that it clicks into place.
2.Incorrect Start-Up Procedure
If you’re new to using your dryer or have recently changed settings, you might be starting it incorrectly. On some models, a simple press of the Start button isn’t enough. Instead, you may need to hold down the Start button for several seconds to initiate the drying cycle. Additionally, some dryers require you to first press a Power button to activate the machine and then select a drying cycle before the Start button will turn on the dryer. Consult your user manual for specific instructions related to your dryer model to ensure you’re following the correct start-up procedure.
3.Child Lock or Control Lock Activated
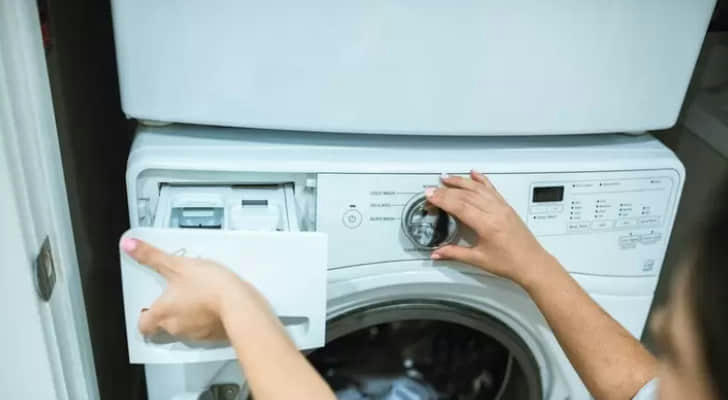
Modern dryers often feature child lock or control lock functions, especially those with digital control panels. These locks are designed to prevent unintended changes to settings or to keep children from tampering with the dryer. If the child lock or control lock is activated, you may find that the dryer won’t start and the door may be difficult to open. Look for symbols such as a padlock, key, or baby icon on the control panel, or check for the word “Lock.” To disable the lock, refer to your dryer’s user manual for the specific button combination needed to turn off this feature. Typically, this involves pressing and holding certain buttons simultaneously or for a set duration.
4.Incorrect Dryer Cycle Setting

If your dryer turns on but fails to start the drying cycle, it’s possible that the cycle settings are incorrect. Many modern dryers come with various drying modes and advanced features like "Automatic mode" which can influence how and when the dryer operates. Check that the cycle selected is appropriate for your laundry load. For instance, if the dryer is set to an “Automatic” mode but doesn’t seem to be initiating, try switching to a standard timed cycle to see if that resolves the issue. Adjusting the cycle setting can often help you identify whether the problem is related to the selected mode or another issue.
5.Dryer Not Plugged In or Outlet Issues
Another common issue is that the dryer might not be properly plugged in, or there could be a problem with the outlet. Begin by ensuring that the dryer plug is securely connected to the outlet. Inspect the plug and the outlet for any visible damage or wear. The dryer requires a 240-volt outlet to operate correctly. If the outlet isn’t providing the proper voltage, the dryer may not turn on at all.
To check if your dryer has power, open the door and see if the interior light turns on. If the light is functioning, the dryer is receiving power, but it might not be the correct voltage. If the dryer isn’t working despite having power, there could be an issue with the outlet or wiring. The problem could be due to a tripped breaker or a larger electrical issue. Consider testing the outlet with a voltage tester or calling a professional to inspect the electrical system.
6.Tripped Circuit Breaker
A tripped circuit breaker is another potential cause of a dryer not starting. Electric dryers typically require two separate breakers, while gas dryers use only one. If your electric dryer is not starting at all, or if it turns on but doesn’t produce heat, it’s worth checking the circuit breakers in your electrical panel. Look for breakers labeled “dryer” or “laundry” and see if any are in the “off” position. If you find one that’s tripped, flip it back to the “on” position.
Additionally, check for any GFCI (Ground Fault Circuit Interrupter) outlets near your dryer. If a GFCI outlet has tripped due to a ground fault, it may cut off power to your dryer. Press the "Reset" button on the GFCI outlet to restore power. If resetting the breaker or GFCI does not solve the problem, it might be time to consult an electrician to investigate potential issues with the outlet or your home’s electrical wiring.
7.Broken Door Switch

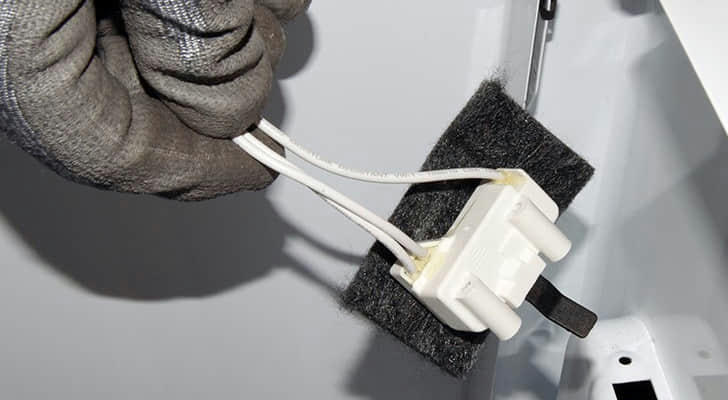
If your dryer won’t start, a broken door switch might be the culprit. The door switch is a critical component that signals to the dryer when the door is securely closed and safe to operate. When this switch fails—whether due to damage, misalignment, or internal issues—the dryer will not start.
How to Diagnose and Fix a Broken Door Switch:
Inspect the Switch: Open the dryer door and locate the door switch. On a front-load dryer, it’s typically a metal tab positioned at the top-right corner. For top-load dryers, it looks more like a button. Check the switch for any visible signs of damage or wear.
Test the Switch: Press the switch to see if it clicks into place. A loose or non-clicking switch indicates that it might be faulty.
Check Continuity: If the switch appears intact but the dryer still doesn’t start, it could be an issue with the internal circuit. To test this, unplug the dryer from the power source and, if applicable, turn off the gas supply. Refer to your dryer's manual for guidance on removing the switch.
Use a Multimeter: With the switch removed, use a multimeter set to continuity mode. Place one probe on each terminal of the switch. If you hear a beep, the switch is functioning. If not, the switch needs replacement.
By replacing a faulty door switch, you can resolve starting issues and ensure your dryer operates safely.
8.Faulty Start Switch
A malfunctioning start switch can prevent your dryer from turning on. If the dryer’s start button doesn’t activate the appliance, it might be because the switch has failed or shorted out. This problem is common in dryers controlled by a dial or push-to-start button.
How to Diagnose and Replace a Faulty Start Switch:
Access the Start Switch: To examine the start switch, you need to remove the dryer’s panel where the button is located. Ensure that the dryer is unplugged and, if it’s a gas model, disconnect the gas supply before proceeding.
Inspect the Switch: Once you have access to the start switch, look for any signs of damage or wear. The switch should be positioned directly beneath the button you press to start the dryer.
Test for Continuity: With the switch removed, use a multimeter set to continuity mode. Place one probe on each terminal of the switch. A beep indicates that the switch is functioning correctly. If there is no beep, the switch is faulty and needs replacement.
Replace the Switch: Purchase a new start switch that matches your dryer’s model. Install it by reversing the removal process and testing the dryer to ensure it starts properly.
Addressing a faulty start switch will restore your dryer’s functionality, allowing it to operate as intended.
9.Worn or Broken Dryer Belt

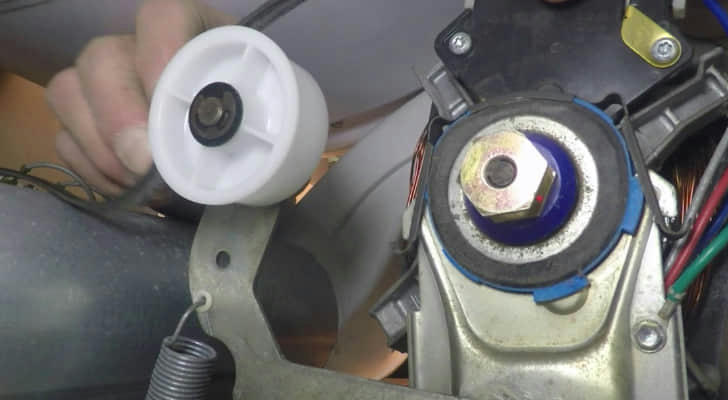
If your dryer starts up but the drum doesn’t rotate, a worn or broken belt could be the culprit. The belt is a crucial component that wraps around the drum and connects it to the motor. If it becomes loose, frayed, or breaks entirely, your dryer won’t function properly.
Here’s how to check and address a faulty belt:
Safety First: Unplug the dryer from the power source. For gas dryers, also turn off the gas supply to ensure safety while inspecting.
Open the Dryer: Consult your dryer's manual for instructions on how to open the unit. For front-load dryers, you’ll typically need to remove the top panel to access the belt. For top-load dryers, you should remove the front panel to gain access.
Inspect the Belt: Once you have access, visually check the belt. If the drum is visible but the belt is missing or appears broken, you will need a replacement. A belt that has slipped off or snapped will need to be replaced with a new one.
Replace the Belt: If the belt is visibly worn or broken, purchase a new belt that matches your dryer’s specifications. Replace the old belt with the new one, ensuring it fits snugly around the drum.
By following these steps, you can determine if the belt is the issue and replace it if necessary, restoring your dryer to proper working condition.
10.Blown Thermal Fuse
A blown thermal fuse can prevent your dryer from starting or cause it to run without producing heat. The thermal fuse is a safety device designed to cut off power to the dryer if it overheats, which helps prevent potential fire hazards. If you suspect the thermal fuse is the issue, you can test and replace it yourself if you’re comfortable with basic electrical work.
Here’s how to diagnose and replace a blown thermal fuse:
Locate the Thermal Fuse: Check your dryer’s manual to find the location of the thermal fuse. If you don’t have the manual, you can usually find this information on the manufacturer’s website. The fuse is often located in the dryer’s exhaust duct or near the heating element.
Prepare for Inspection: Unplug the dryer from the power source. For gas dryers, also disconnect the gas supply to ensure safety during the inspection.
Remove the Thermal Fuse: Carefully remove the thermal fuse from its mounting position. Be cautious not to damage any surrounding components.
Test the Fuse: Using a multimeter set to continuity mode, test the fuse to determine if it is functioning. Place one probe on each terminal of the fuse. If the multimeter beeps, the fuse has continuity and is not the problem. If there is no sound, the fuse is blown and needs replacing.
Replace the Thermal Fuse: If the thermal fuse is blown, purchase a replacement that matches your dryer’s specifications. Install the new fuse in the same location as the old one.
Check for Underlying Issues: A blown thermal fuse often indicates an underlying problem, such as poor ventilation or overheating. Consider having a professional technician inspect your dryer to address any issues that might have caused the fuse to blow. Proper ventilation and regular maintenance are crucial to prevent future problems and ensure safe operation.
By following these steps, you can address the issue of a blown thermal fuse and restore your dryer’s functionality. However, addressing any underlying causes of overheating will help prevent recurrence and ensure your dryer operates safely.
11.Circuit Board or Motor Issues
If you’ve tried all other troubleshooting methods and your dryer still isn’t starting, the problem might lie with the circuit board or motor. These components are crucial for your dryer's operation, and issues with either can prevent the appliance from functioning correctly.
How to Diagnose and Address Circuit Board or Motor Problems:
Inspect the Circuit Board: If you’re comfortable doing so, consult your dryer's manual to access the circuit board. Look for visible signs of damage, such as burn marks or shorts. These indicators can signal that the circuit board is faulty.
Check the Motor: The motor is another critical component that can fail. Inspect it for any unusual noises or signs of malfunction. If the motor is not operating correctly, it can prevent the dryer from starting.
Consider the Age of Your Dryer: Replacing a circuit board or motor can be expensive, especially if your dryer is older. Evaluate whether the cost of repairs is worth it compared to purchasing a new dryer.
Warranty and Professional Help: If your dryer is still under warranty, contact the manufacturer or the retailer (if you have a store warranty) to request a repair. This could save you from out-of-pocket expenses. If the warranty has expired, reach out to a professional appliance repair service for further diagnosis and recommendations.
